For someone who never learned “computers” in school, I’m actually pretty fond of the command line interface. I was one of those kids who was lucky enough to have a computer at home since before I was born. The first operating system I could remember using was MS-DOS. So it was very important to learn the command line so I could load and play games.
And that’s also why, more than twenty years later, I must have DOSBox installed in every machine I own. It’s an emulator that let’s you play all the DOS games that you grew up with.
Back to the topic at hand. As a web developer, using the terminal is part and parcel of my day. But other than installing iTerm2 and customising its colour scheme, I never really did anything more. I recently chanced upon this article by Mike Buss on optimising the terminal experience and decided to try it out as well.
What is shell?
Shell is simply a command line interface (CLI) that allows users to interact with the computer’s operating system. Most people are used to graphical user interfaces (GUI) like Windows or OSX.
Personally, I think people shy away from the command line because of the Hollywood Hacking trope that associate typing commands with hard-core hacking. Well, pointy-clicky with a mouse is never as fast tappity-tap on a keyboard. Just saying.
Bash vs Zsh
Bash is the default shell on Linux and Mac OS X. Zsh is an interactive shell which incorporates a lot of useful features from other shells. In addition, there’s a bunch of things Zsh can do to make your terminal experience better. Enhanced auto-completions and globbing, spell correction, path replacement, the list goes on.
My migration experience
I was not a terminal power-user to begin with, so it was pretty easy for me to just move over from Bash to Zsh. I would think that people who have customised their Bash configurations to a T may probably take longer to move everything over properly.
List of applications installed
- iTerm2
- Homebrew (I use homebrew to manage all my Mac packages so it was already installed)
- Prezto (It's a configuration framework for Zsh)
- Python (Needed for Powerline so you can get cool glyphs in your terminal)
- Vim (Needed for Powerline so you can get cool glyphs in your terminal)
- Powerline
-
Install iTerm2. It’s your terminal on steroids. Just download the installer from the site and run it.
-
Install Prezto. It’s a configuration framework for Zsh. The following is from the official documentation:
-
Launch Zsh:
zsh -
Clone the repository:
git clone --recursive https://github.com/sorin-ionescu/prezto.git "${ZDOTDIR:-$HOME}/.zprezto" -
Create a new Zsh configuration by copying the Zsh configuration files provided:
setopt EXTENDED_GLOB
  for rcfile in "${ZDOTDIR:-$HOME}"/.zprezto/runcoms/^README.md(.N); do
  ln -s "$rcfile" "${ZDOTDIR:-$HOME}/.${rcfile:t}"
done
If, like me, you never used Zsh before, you should not have any .z* files in your home directory and this step should proceed without a hitch. But if you do have any .z* files, you will see a message telling you that the files exist.
If you’re already using Zsh, there will be prompts asking if you want to replace those files. I suggest backing up those files, then replacing them with the ones Prezto is trying to install.
-
Set Zsh as your default shell:
chsh -s /bin/zsh -
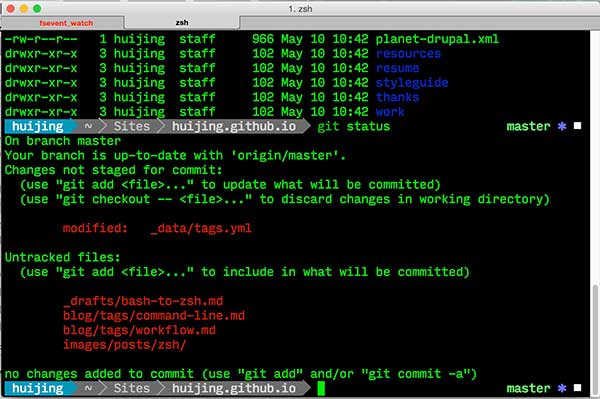
Restart your terminal and you should see the default Prezto theme, chevrons and all
-
-
Configure your .zpreztorc file. You can enable additional modules to make Zsh even more awesome. This is my module configuration.
 # Set the Prezto modules to load (browse modules).
 # The order matters.
 zstyle ':prezto:load' pmodule \
   'environment' \
   'terminal' \
   'editor' \
   'history' \
   'directory' \
   'spectrum' \
   'utility' \
   'ssh' \
   'completion' \
   'homebrew' \
   'osx' \
   'git' \
   'syntax-highlighting' \
   'history-substring-search' \
   'prompt'
The order is very important. According to Josh Symonds,
promptmust come last,history-substring-searchmust come before it, andsyntax-highlightingmust come before that. 4. Set up your theme. Prezto comes with a number of really nice themes (I’m using Paradox right now) but you can always create your own. All the theme files are in the~/.zprezto/modules/prompt/functionsfolder in the formatprompt_THEMENAME_setup. To switch themes, just set it in the .zpreztorc file:zstyle ':prezto:module:prompt' theme 'THEMENAME' -
Install Powerline to get all the cool glyphs to show up. This requires a few more steps. I’m also assuming you already have Homebrew installed. These steps are referenced from Chu Yeow’s article:
-
Install python with homebrew
brew install python -
Install vim with homebrew
brew install vim --env-std --override-system-vimYou must install vim after python so that it’ll compile with homebrew’s python.
-
Install powerline with pip
pip install https://github.com/Lokaltog/powerline/tarball/developPowerline should get installed to
/usr/local/lib/python2.7/site-packages/powerline. -
Open
/usr/local/lib/python2.7/site-packages/powerline. You should see the files required for integration with zsh, vim, tmux, etc. in the bindings directory. -
Add Powerline to zsh by adding this to your .zshrc file.
source /usr/local/lib/python2.7/site-packages/powerline/bindings/zsh/powerline.zsh -
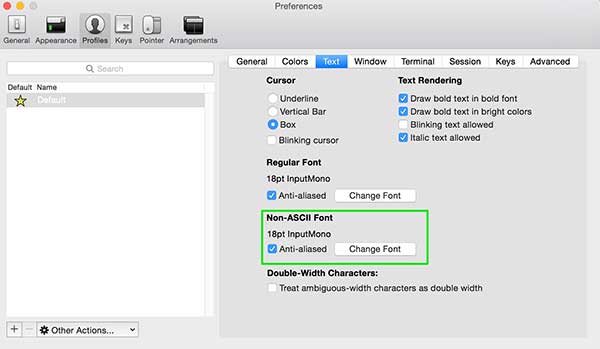
You need to use a patched font, or one that is compatible with Powerline, as the non-ASCII font for iTerm2. I’m using Input Mono. Here’s a list of patched fonts you can use. Go to the iTerm2 preferences, under Profiles, you will find the Text options where you can set your font of choice.
-
-
If you happen to encounter an a long string of errors with the last line showing
ValueError: unknown locale: UTF-8, then you need to add the following to your .zshrc file:export LC_ALL=en_US.UTF-8 export LANG=en_US.UTF-8 -
Move over your bash configurations from your .bashprofile and .bashrc files to your .zshrc file. _Note: this was simple and straightforward for me because I didn’t have much in those files to begin with. Just a couple of aliases and paths.
And that’s it. We now have a levelled-up terminal for all our development needs. Happy coding!